Accessing the Module
How to Use the Filter

With the advanced filter, this type of coincidence does not occur, because it considers only the fields explicitly selected for the search.

If they do not have this permission, they will only be able to see the occurrences in which they are involved.
This is defined under Configurations > Roles and Permissions.
If you choose the advanced filter, this feature will be enabled to further refine your search — simply click the advanced filter button

Advanced Filter
Using advanced filters allows you to further refine the selection of information displayed. By configuring specific filters for each field, searches become more detailed and aligned with your needs, making it easier to focus on the data that is truly relevant.
You can combine multiple advanced filters simultaneously or use a single filter, depending on the goal of your analysis.
Status
In the Status option, you can filter occurrences according to their current status:awaiting evaluation, open, completed, associated, canceled, or rejected.
Simply select the statuses you want to display in the list and, if desired, remove those that are not relevant to your analysis at the moment.
After adjusting the filters according to your needs, click “Filter” to execute the search.
In the example below, we searched only for completed occurrences.


This command removes all criteria defined in the filter at once, making it easier to reset your search.
The same procedure applies to the other filter options.
Situation
The Situation indicates the stage the occurrence is currently in:
-
On time:
The occurrence is active, and the deadline for resolution has not yet been exceeded.
This indicates that the monitoring is proceeding as planned. -
Late:
The occurrence is still open, but the established deadline has already passed.
This status signals the need for quick action to avoid greater impacts. -
Closed on time:
The occurrence was fully resolved before or exactly on the established deadline, demonstrating efficient management and adherence to timelines. -
Late closing:
The occurrence was resolved, but after the deadline.
This indicates that some challenge or unexpected event occurred during the process, serving as an alert for future improvements.

Issuer
Select the user(s) who issued the occurrences you want to view.
After defining the desired filters, click “Filter” to display the results.

Approval responsible
Select the user(s) who approved the occurrences you want to view.
After configuring the filters, click “Filter” to display the results.

Occurrence responsible
Select the user(s) responsible for the occurrences you want to list.
After configuring the filters according to your needs, click “Filter” to view the results

Step Responsible
Select the user(s) responsible for the current step of the occurrences you want to view.
After configuring the filters according to your needs, click “Filter” to display the search results.

Current Responsible in the Approval flow
Select the user(s) responsible for the current step of the approval workflow for the occurrences you want to list.
After configuring the filters according to your needs, click “Filter” to view the results.

Team
Select the user(s) you want to define as the team responsible for the occurrences.
After configuring the filters as needed, click “Filter.”
Only the occurrences in which the selected collaborator(s) were added as part of the responsible team will be displayed.

Location
Select the Location(s) related to the occurrences you want to view.
After defining the filters, click “Filter” to display the results.

Type
Select the Type(s) related to the occurrences you want to view.
After defining the desired filters, click “Filter” to execute the search.

Category
Select the Category(ies) related to the occurrences you want to view.
After defining the necessary filters, click “Filter” to perform the search.

Customer
Select the customer(s) related to the occurrences.
After configuring the filters as needed, click “Filter.”
Only the occurrences linked to the selected customer(s) will be displayed.

Supplier
Select the Supplier(s) related to the occurrences you want to view.
After adjusting the necessary filters, click “Filter” to perform the search.
If your company does not have the Suppliers module enabled, this option will be unavailable.

Material/Service
This filter will only be available after the Supplier field is filled in, as the selection of materials and services is linked to the chosen supplier.
First, select the Supplier(s), and then choose the material(s) and/or service(s) related to the occurrences.

Emission Date
Filters occurrences according to the issuance period, considering the date on which they were registered.
To use this filter, enter the desired start date and end date in the corresponding field.

Start Date
Displays in the list the period in which the treatment of the occurrence was initiated, as defined at the time of approval.
Enter the start date and end date of this period to filter the results.

Deadline
Allows you to filter occurrences whose completion deadline falls within the selected date range.
The completion deadline represents the total number of days required to finish all steps of the occurrence.
To use this filter, both the start date and end date of the desired period must be entered.

Completed In
Displays the occurrences whose completion date falls within the defined range.
The completion deadline represents the total number of days required to complete all steps of the occurrence.
To apply this filter, it is necessary to provide both the start date and end date of the desired period.

Show only occurrences with incidences
Enable this option to display only the occurrences that contain at least one incident.

Show only recurring occurrences
Enable this option to display only the occurrences marked as recurrent, meaning those identified as repetitions of a previous occurrence.

Show only associated occurrences
Enable this option to display only the occurrences that are associated with other occurrences.

Show only late occurrences
Enable this option to display only the occurrences that are past their deadline, whether related to the completion of a specific step or the closure of the occurrence as a whole.

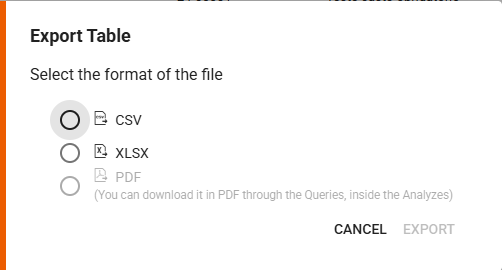
Exporting information returned from the advanced filter
By clicking “Export”, you generate a file containing the information filtered according to the criteria defined in the advanced filters.
Only the data from the columns that are currently enabled at the time of export will be included.